One of the unique characteristics of backpacking is that it puts you in control of your own destiny in a very real, but sometimes dangerous, manner. There are no hospitals, usually no access to roads or ambulances, and very few doctors in the backcountry.
If, therefore, someone in your group gets sick or injured, then you are on your own. Your training, preparation, equipment, and attitude could, in certain circumstances, literally make the difference between life and death.
Even in less extreme cases, knowing the appropriate first aid techniques can make a great difference to the afflicted person’s recovery and comfort while afflicted, so doing your homework and being prepared are very worthwhile practices.
In this article, we’re going to take a look at the steps anyone can take to diagnose and treat the most common ailments and injuries that occur in the backcountry.
Before we do that, let’s take a quick look at the big do’s and don’ts of wilderness first aid.

- Buy or build your own first aid kit
- Learn how to use everything in your first aid kit
- Appoint a designated first-aider in every group
- Take a wilderness first aid class
- Be prepared to be entirely self-sufficient
- Replace and replenish dated items in your first aid kit
- Acquaint yourself with the S.A.M.P.L.E method of diagnosis

- Assume someone else will take responsibility for your wellbeing
- Attempt to reset the bone in a fracture alone
- Delay before taking action to remedy any incipient or recently transpired ailments
Diagnosis—The S.A.M.P.L.E Method
The S.A.M.P.L.E method is essentially a simple checklist for diagnosing any illness, ailment, or injury that can not only help you narrow down the causes of the affliction but also deal with the stress of an emergency situation by using a methodical system to keep things simple.
S.A.M.P.L.E is an acronym that stands for Symptoms, Allergies, Medications, Past Medical History, Last Ins & Outs, and Events leading up to it (the injury/illness).
When confronted with an emergency medical situation, go through the S.A.M.P.L.E checklist of questions, which should allow you to gain the requisite level of context to be able to deal with the injury or ailment effectively.
- What are the Symptoms?
- Does the afflicted party have any Allergies?
- Is he/she taking any Medication?
- What is his/her Past medical history?
- What were her/his Last ins and outs? (This, of course, refers to what the person last ate or drank and the outcome/details of their last toilet visits).
- What were the Events leading up to the illness or injury?
For more on the S.A.M.P.L.E method, check out this informative article by Real First Aid.
Common Mountain Maladies & How to Treat Them
While just about any injury or ailment can befall us in the outdoors, below I’ve included a list of the most common ones and how you should go about dealing with them.
Stomach Problems
Backpackers occasionally experience minor stomach problems from eating unfamiliar food, unusual physical exertion, and even from the stress of adapting to the unfamiliarity of a wild environment.
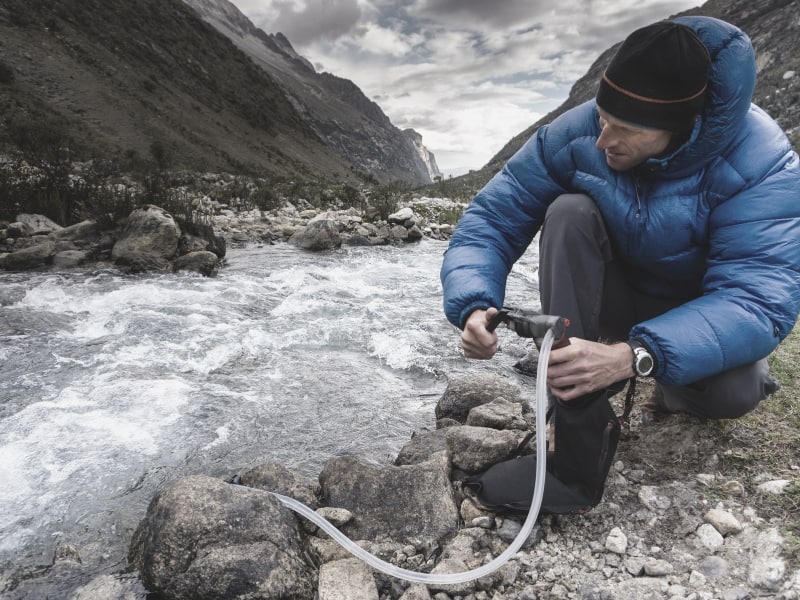
The worst gastrointestinal afflictions, however, are those that result from drinking unpurified water, eating food that is spoiled or “off”, bacteria passed from person to person by way of dirty hands, or a camping utensil that hasn’t been cleaned properly.
The appropriate first aid for minor stomach problems is to provide antacids like Tums or Pepto Bismol. If diarrhea is the problem, then give the stricken hiker a couple of Imodium tablets. Always make sure they are drinking extra water to avoid dehydration and, of course, purify or filter all water before drinking.
Dehydration
Hikers and backpackers should aim to take on a ballpark 3-4 liters of water per day, with this figure increasing in especially hot and sweaty conditions or at high altitude. In addition to heat, dehydration can be caused by medications, illness, and excessive sweating caused by wearing too many layers.
The first signs of dehydration are usually dark urine and headaches, followed by dizziness, vomiting, stumbling, and slurred speech.
The appropriate first aid for anyone suffering from dehydration is to stop, rest in a shaded spot, and rehydrate with rehydration salts. Again, prevention is far easier than curing and hikers should try to take on at least one liter per two hours on the move.
Sunburn
Sunburn is caused by exposure to UV radiation and so minimizing our skin’s exposure to these rays is the way to avoid any nasty and potentially very painful skin problems. For hikers, the risk of sunburn increases at high altitudes, where there is less natural protection against UV rays than at sea level.
To avoid sunburn:
- Wear sunscreen, especially on ears and face – the higher the SPF the better
- Wear light-colored, full-length shirts and pants (with a high UV protection rating if possible)
- Wear a sunhat
- Hike early and late, resting up when the sun’s at its peak
First Aid for sunburn is to apply aloe or another cooling agent and to cover up with loose clothing.
Heat Illnesses
Heat cramps, heat exhaustion, and heat stroke are all caused by strenuous physical exercise in hot weather, which is a common scenario during backpacking trips from mid-spring to mid-fall.
Check out our other guides on health & survival:
- What to do during a thunderstorm – Lightning safety guide
- Don’t let fear overcome you when you are out on the trail
- Surviving in the wilderness is a product of learning multiple skills
- How to take bear safety precautions
The symptoms of these are as follows:
- Heat cramps—slowing circulation and fatigue
- Heat exhaustion—dizziness, weakness, nausea, and headaches
- Heat stroke—red skin and the complete failure of heat loss mechanisms, which can, in extreme cases, quickly result in death
To treat each of the above ailments, get the victim into the shade, pour water on his/her head and torso, and rest until their body cools down.
Hypothermia
It’s very easy to get very cold while trekking at any time of year if the weather turns unexpectedly frigid, you get caught in a storm, or you haven’t dressed appropriately. In such situations, hypothermia is a very real threat.
The first sign of hypothermia is shivering, but the condition can quickly evolve into stumbling, mumbling, and eventually fumbling and a lack of coordination (loss of motor control).
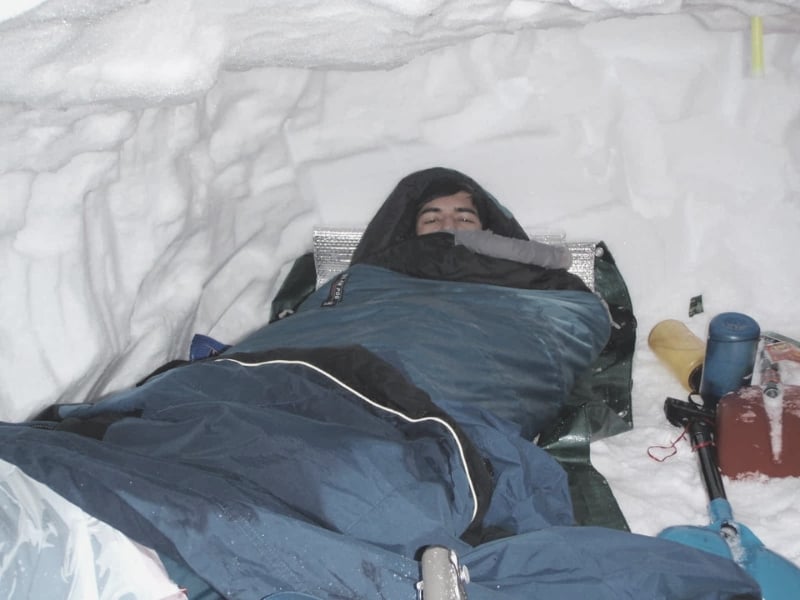
People in second stage hypothermia often show no symptoms (they stop shivering) as their bodies begin to divert circulation from their extremities to the body’s core to increase their chances of survival. By this point, victims are losing motor control and often try removing clothing they believe is restricting their movement or making them feel too hot. In many cases, the victim will deny feeling any discomfort and so the awareness of their hiking partners is crucial to diagnosis and treatment.
First aid for hypothermia is to get the victim out of any wet clothing (even if they have to borrow clothes), shelter them (in a tent, dry sleeping bag, or extra dry clothing), build a fire, and provide hot beverages. In extreme cases, these remedies might have to be forced on unwilling or uncooperative hikers.
Extreme Hypothermia
Once the body loses its ability to regulate body heat, core temperatures can quickly drop to the point where the body shuts down. In severe cases, the victim might be experiencing extreme fatigue, disorientation, and will want to go to sleep. In such situations, saving the afflicted’s life depends on arresting the drop in their body temperature:
- Don’t let the victim fall asleep
- Don’t make any sudden movements or loud noises—this may cause the victim’s heart to stop
- Remove any wet clothing
- Get the victim into a sleeping bag
- Have one or two people hug the sleeping bag so the victim can benefit from their body heat, or…
- Pile other sleeping bags and blankets over and under the victim
Altitude Sickness
Every 1,000 feet of elevation gain reduces the body’s maximum work capacity by 3%, so the higher you climb, the more difficult it is for your body to function optimally.
Since many backpacking trips involve climbing mountains and crossing mountain passes, altitude sickness is very common.
Symptoms include headache, nausea and vomiting, puffy hands and face, weakness, shortness of breath, and decreased appetite. It can affect experienced hikers as well as those on their first outing. Usually, hikers acclimate to the altitude and the symptoms recede within 24 hours.
First aid for altitude sickness is to take on plenty of fluids and rest. If someone is having problems with altitude sickness, and the hike profile is showing several days of high altitude hiking, look for an alternative route at a lower altitude. If symptoms persist, then it is imperative that you retreat to a lower altitude as soon as possible.
Certain medications have been used over the years as a means of reducing the effects of altitude sickness, most notably Diamox. While some high-altitude hikers insist on this drug’s effectiveness, too often it gives hikers an unhelpful complacency or hubris that causes them to skip or reduce their period of acclimatization, often with deadly consequences.
Other high-altitude hikers in the past have sworn by Viagra as a means of staying healthy at heights, but we wouldn’t recommend it (not, at least, for altitude-related problems!).
Twists and Sprains
The nature of the terrain on most hiking trips means that twists and sprains are something of an ever-present danger. Avoidance, of course, is the best way to go—watching your feet, using trekking poles to improve your balance, and sticking to established trails. But even those of us who take these hiking safety measures, sadly, aren’t guaranteed to finish any trail without injury.
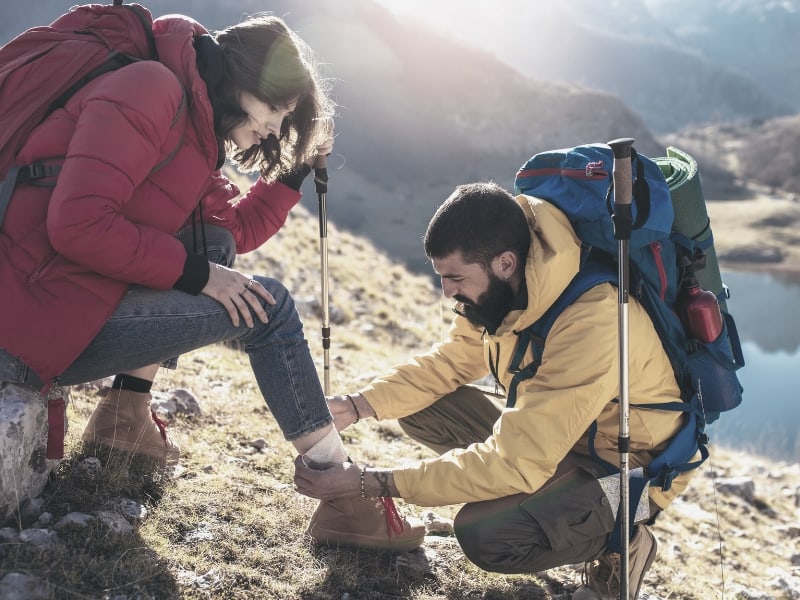
If you or a member of your team twists or sprains an ankle, knee, or wrist (the three most common cases), take the following steps:
- Rest the injured limb—stop, sit down, and support it in a raised position.
- Cool with a wet shirt or by placing it in water for 15-20 minutes to reduce pain and swelling.
- Apply pressure to the sprain/twist with a compression bandage to help reduce inflammation.
- Ensure that the bandage is not too tight by pressing on the flesh below the bandage until the flesh turns white. If the color does not return quickly after releasing the pressure then the bandage is too tight.
- Reapply the cold compress or place the sprained limb in cold water again every 2-3 hours.
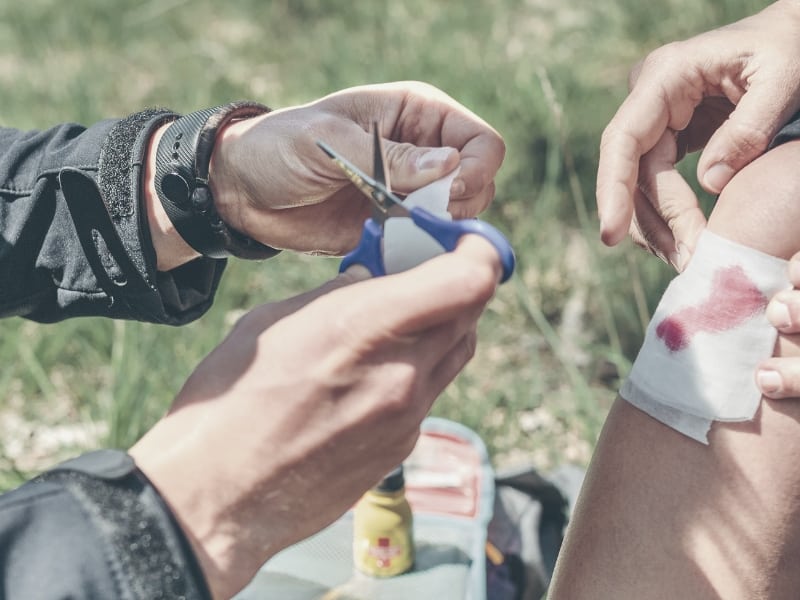
Cuts and Scrapes
Time in the outdoors and cuts and scrapes tend to go hand in hand. Low-hung branches, sharp rocks, slippery scree, backpack straps and (mishandled) camping knives are just a few potential perpetrators.
For the most part, any wounds we acquire on our travels are minimal and unlikely to cause too much discomfort or disruption to our plans. If, however, the wound is more sizable or we allow infection to set in, then things start to look a whole lot different.
To treat cuts and scrapes:
- Cleanse the area thoroughly
- Wipe clean with a disinfectant wipe or gauze soaked in antiseptic lotion
- Apply antiseptic cream/lotion to limit the risk of infection
- Cover the affected area with a bandage
- Reapply the antiseptic and replace the bandage every 4-5 hours
Breaks and Fractures
Breaks and fractures usually spell the end of any outing. But getting yourself or an injured team member from the site of the accident to safety requires on-the-spot treatment to immobilize and protect the break. If you or any member of your team sustains a suspected break or fracture, take the following course of action:
First, determine whether you’re dealing with a simple or a compound fracture
In the case of a simple fracture, the limb will be bruised and swollen and possibly immobile.
With compound fractures, the bone usually pierces through the skin or, less frequently, will be visibly out of place.
Don’t try to reset the broken bone
Trying to reset a broken bone often seems like the obvious course of action but, in reality, is only like to cause further complications. Resetting a bone is a difficult procedure and should only be undertaken by someone with extensive medical experience. Instead, your next step should be to protect the break and stabilize it with a splint, gauze, or tourniquet.
Immobilize the break with a tourniquet or splint
Whether a tourniquet or a splint is required will be determined by the type and the severity of the fracture.
In most cases, for simple fractures a splint is the way to go. A number of materials can be used to make a suitable splint, including a sturdy branch, trekking poles, or a foam sleeping pad. Be sure to place the poles or branches on both sides of the broken limb and keep them from touching the wound and tie them in place with rope, cord, a bandana, a hiking towel, a t-shirt, or even a backpack strap.
Take care to tie the splint tightly enough to keep it in place but not so tightly that it cuts off circulation
In the case of a compound fracture, and particularly if the amount of blood flowing from the wound is significant, then in all likelihood a tourniquet will be required.
To make a tourniquet, use a shirt, bandana, or piece of rope and tie it tightly roughly two inches above the wound towards the center of the body. If you can’t tighten the tourniquet adequately, you can wrap the ends of the material around a stick and turn it like a dial while holding the material in place to increase tension. Once your tourniquet is in place, call the emergency services as soon as possible and/or head for the nearest trail exit or trailhead.
Blisters
As inevitable to hiking as death and taxes are to life in general, blisters are a small ailment that can cause big problems if not treated correctly.
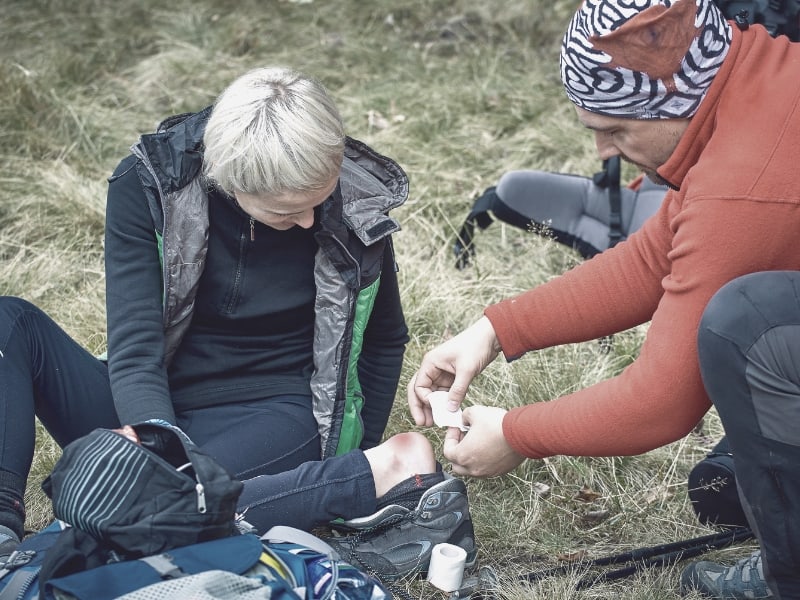
The most common cause of blisters for hikers and backpackers is the friction caused between boots and socks and the skin of their feet, which can be caused or exacerbated by pressure points (when laces are tied too tightly or there’s a wrinkle in your socks), repeated rubbing (on a loose shoe), and moisture (which makes the skin softer and more susceptible to damage by friction).
To prevent blisters forming:
- Ensure your boots fit well and are properly broken in
- Wear appropriate socks—high-wicking synthetic materials or wool are best
- Avoid cotton—cotton soaks up sweat and thereby increases moisture and the potential for rubbing
- Wear liner socks to add an additional buffer between your skin and your boots
- Change socks regularly, particularly if hiking in damp conditions or working up a sweat
- Act quickly when a hot spot kicks in—let your feet rest and air for a few minutes, throw on a bandage, then change socks
- Carry a blister-repair kit with surgeon’s tape, kinetic tape, molefoam, synthetic medical tape, and/or blister bandages with pads and gels (like 2nd Skin)
To treat a blister, there are various options, but in my experience, the most effective goes as follows:
- Cut a “doughnut hole” the size of the blister in molefoam padding and trim the padding down so as to leave a centimeter around the blistered area.
- Stick a square or molefoam or surgical tape over the doughnut ring to keep it in place and add further protection.
- Drain the blister if need be (if too large to leave undrained) with a sterilized needle, add antiseptic cream or ointment, and then follow steps 1 and 2.
Chafing
Chafing is one of those complaints that can be mildly humorous—until, that is, you’ve experienced it for yourself. In short, this ailment is just about as painful and frustrating as any there is and its potential to ruin your hiking trip should not be underestimated.
Chafing occurs as a result of friction between your skin and your clothing, your gear, or other parts of your skin. The symptoms of chafing include a light burning sensation or “hot spot,” a more severe rash, or an open, live wound.
As with most outdoor ailments, prevention is easier than a cure.
A few things you can do to prevent chafing include:
- Use lubricant or cream in chafe-prone areas (between the thighs, butt cheeks, shoulders, armpits, and on the nipples)
- Wear breathable, synthetic, seamless, and tagless clothing
- Wear synthetic or breathable underwear—and avoid cotton at all costs
- Allow for airflow and avoid bunching by leaving your shirt untucked
- Keep your clothes clean—the saltiness from your sweat can encourage chafing
- Wash frequently to oust the chafe-causing salt crystals in your sweat, particularly in chafe-prone areas
- Stay dry—replace any clothing soaked with sweat before you start to feel the rub
- Wipe well after toilet visits (gross, I know, but excrement is a strong skin irritant and can exacerbate chafing)
- Stay hydrated to dilute the concentration of salt in your sweat
- Use kit that fits—the straps and the padding on the back area of your backpack are common areas for chafing. Look for a pack with a mesh panel and be sure to fit your pack to your torso length
If chafing sets in regardless of your efforts to avoid it, take the following steps:
- Stop immediately—continuing will only make the problem worse and aggravate the wound
- Wash the affected area
- Change clothing
- Adjust straps if need be
- After cleaning the affected area, apply antiseptic lotion and cover the area with a nonstick gauze or sterile pad
- Reapply lubricant
- Hydrate
Check out our buyer’s guides on health & survival:
- Which brand do we consider to be the best axe for backpacking?
- After many tests, we run the rule over which is best axe
- Consider taking a camping saw on your next trip
Last update on 2024-04-19 / Affiliate links / Images from Amazon Product Advertising API

